Uninstall BlueStacks Complete Guide – September 2019

Why Bluestacks fail to uninstall completely:
Page Contents
- 1 Why Bluestacks fail to uninstall completely:
- 2 Why Bluestcks is installed:
- 3 #Completely Uninstall Bluestacks
- 3.1 Step by step guide to Uninstall BlueStacks Completely:
- 4 Conclusion:
Even though we uninstalled blue stacks many times, it fails to Uninstall blueStacks Completely. As a result, we can not install BlueStacks again. It always shows blue stacks already installed even though you tried to install again it won’t allow installing again, it Looks so embarrassing and thinking What to do, No problem here I will explain how to uninstall BlueStacks completely to install Bluestacks again.
#Why fails to uninstall completely
Why this happens,
After removing an application it will not remove 100% as you can see that once a trial version of a software if you re uninstall and reinstall software then also you won’t get trial version again. This adds some registry files to the system in some cases. this is the same happened with the bluestacks app.
With this process, you will able to completely uninstall bluestacks and which helps to reinstall bluestacks again if you wish for further use.
Note: If you want to install it future then you must uninstall properly.
Why Bluestcks is installed:
Bluestacks is an android emulator which will help to run Android apps in and windows. You can simply install bluestacks on your pc, then sign in with Gmail account and enjoy all features.
- can set fake location
- can use to install WhatsApp, hike, and all apps.
#Completely Uninstall Bluestacks
Step by step guide to Uninstall BlueStacks Completely:
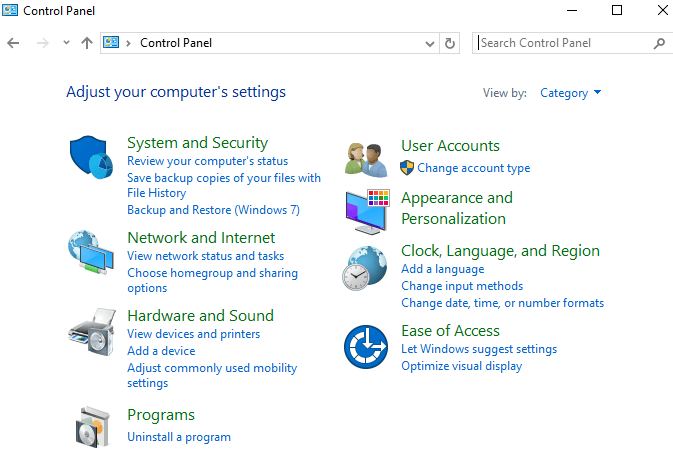
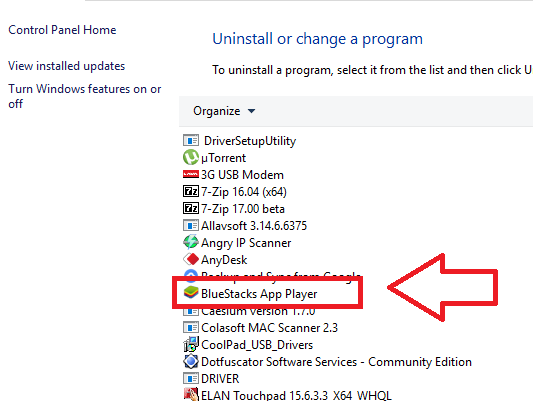
- Go to Control Panel >> Uninstall BlueStacks
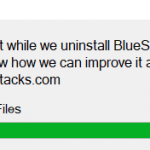
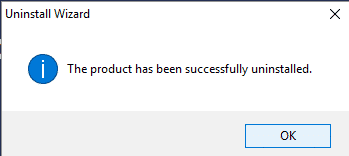
Control panel is a place which is used to take control over your pc like sign in, security, connecting to the internet, adding additional drivers and installing and uninstalling programs from PC.Once you select the bluestacks it will open a window which asks you to continue uninstalling or not then Click Yes to uninstall blue stacks. You can see that at below screen.Deleting Bluestacks app player, you can see the screen, How it shows deleting files.just click yes, then it will start uninstalling bluestaks. - Clear all data from C drive (It is mandatory to clear all data )
- Go to C drive >> Program files >> Find BlueStacks folder and delete folder totally, if you don’t find any folder then it shows that the folder deleted in uninstall process.
- After completion of deleting.
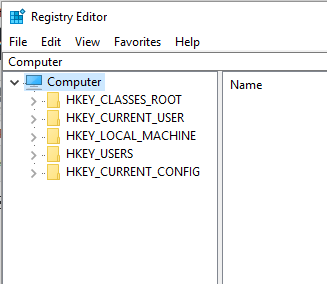
- Go to Run (Click control+R to get Run box and click Ok)
- Enter regedit in Run box and click enter.
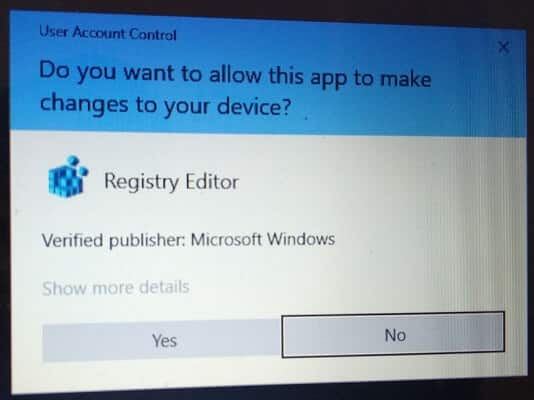
- Give user access control.
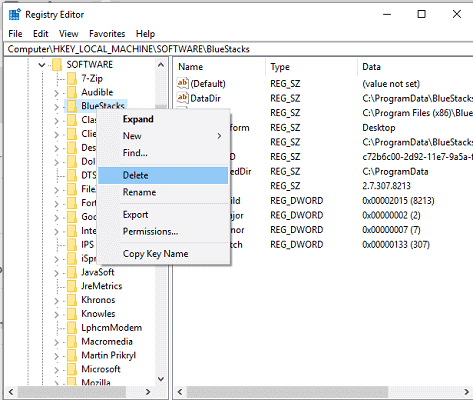
- Then go to H_KEY LOCAl_MACHINE >> Software >> And delete Bluestacks folder.
- Then Goto RUN and enter %temp% to Clear Temp Files.
- Then try to install BlueSacks now it will install without any problems.

If you face any problems, do comment below.
Conclusion:
Do steps carefully, don’t delete other files, if you delete other files it leads to stopping working some drivers of the computer. As a result, you face problems I feel This guide helped you. Thanks for visiting keep visiting trikcs5.